Bathroom tile installation can be like giving it a brand new look, making it more useful and more you. But, even if you’re super excited to do it yourself, you could run into some troubles if you’re not ready for them. This guide is here to help you avoid common mistakes when putting tiles in your bathroom, ensuring your project goes smoothly from the beginning to the end. Think of it as your buddy giving you advice so you can make your bathroom beautiful without hitting too many bumps along the way. By paying attention to this guidance, you’re setting yourself up for a successful makeover that will make your bathroom look amazing and work better for you.
Setting the Stage for a Successful Tile Installation Project
Starting a bathroom tile installation project is an exciting adventure! It’s all about turning your bathroom into a space that not only looks good but also stands up to the test of time However, diving into tiling for the first can be full of surprises and not always the good kind. Making sure those tiles are put in just right is super important because you don’t want to end up with a bathroom that looks like a jigsaw puzzle gone wrong. There are a bunch of easy-to-make mistakes, like picking the wrong tiles that don’t handle water well, or ending up with uneven spaces between them that scream “oops!” That’s why this guide is going to be your best friend. It’ll walk you through everything step-by-step, making sure you feel like a pro, even if it’s your first go. With a little bit of help, you’ll be able to tackle your project head-on and end up with a bathroom that makes you proud every time you step into it.
Understanding the importance of proper bathroom tile installation
When you decide to put new tiles in your bathroom, it’s like giving it a mini-makeover that can change how it looks and works for the better. Imagine stepping into your bathroom and seeing bright, well-fitted tiles that make everything look clean and inviting – that’s what a good tile job does. But, if it’s not done right, it’s a whole different story. Tiles that aren’t installed properly can let water sneak behind walls and under floors, which is a surefire way to get mold and damage that can cost a lot to fix, not to mention the headache it brings. So, when it comes to tiling your bathroom, getting it done correctly is super important. It’s not just about making it look good for today, but it’s also about preventing problems that could make you frustrated and out of pocket in the future.
Discussing the common pitfalls many encounter
When stepping into the world of do-it-yourself (DIY) projects, it’s like embarking on a big adventure, where excitement is high but so are the chances of running into trouble. Often, people start with great enthusiasm but find themselves in a pickle because they picked the wrong materials or didn’t plan properly. Imagine deciding to paint your room without checking if the paint works on your walls or planning to build a shelf without measuring the space first. These slip-ups are like picking up a map without checking if it’s for the right city. Recognizing these bumps in the road ahead of time is like having a magic compass that helps you steer clear of trouble. It’s all about doing a little homework before diving into your project. If you take the time to choose the right materials that fit your task and plan each step carefully, you’re setting yourself up for a smoother ride. In the big adventure of DIY, a little prep can turn potential mishaps into a route to success.
How this guide will help you navigate through the process
Diving into a tiling project might seem daunting at first, but armed with the right knowledge and tips, you can tackle it confidently. Imagine starting your project knowing exactly which tiles to choose, how to lay them out smoothly, and how to seal them perfectly. This isn’t just about making your space look good; it’s about feeling a sense of achievement as you transform your area with your own hands. By taking the time to learn the basics, like which tools you’ll need and how to prepare your surface, you’re setting yourself up for success. Plus, understanding how to choose the right grout and adhesive means your tiles won’t just stick; they’ll stay put for years to come. So, remember, when you approach your tiling project equipped with these handy insights, you’re not just laying tiles; you’re laying the foundations of a space that’s truly yours, filled with the satisfaction of a job well done.
Mistake 1: Inadequate Preparation and Planning
Diving headfirst into a Do-It-Yourself, or DIY project, without planning is a bit like trying to make a cake without knowing the recipe; it’s likely to end up a mess. Many people get super excited at the start and think they can figure it out as they go along. But, just like baking, every project needs a list of ingredients and a step-by-step guide. Without these, you might end up spending more money fixing mistakes instead of saving money by doing it yourself. Also, guesswork can lead to extra trips to the store, redoing work, or even giving up altogether. To avoid these troubles, it’s smart to take a little time before you start. Look up how others have tackled similar projects, make a checklist of what you need, and maybe even practice a bit if you can. This way, you’re more likely to enjoy the process and be proud of what you’ve made in the end.
The Consequence of Neglecting Measurement Accuracy
- The importance of precise measurements: Underestimating the significance of accurate measurements can lead to either a shortage or surplus of tiles, both of which are inconvenient and expensive.
- How mistakes in measurement can affect the project: Incorrect measurements can disrupt your budget, delay your project, and result in an unsatisfactory finish.
Failure to Prepare the Surface Correctly
- The necessity of a smooth, clean, and dry surface: Proper surface preparation ensures the tiles adhere well and last longer.
- Identifying and fixing issues with the surface before beginning: Any cracks, unevenness, or moisture problems should be addressed before tile installation.
Overlooking the Layout Plan
- The role of a detailed layout in preventing wastage and ensuring an aesthetically pleasing result: A layout plan not only helps in visualizing the result but also ensures efficient use of materials.
- Tips for creating and following a layout plan: Measure twice, cut once, and always keep your design goals in mind.
Mistake 2: Incorrect Tile and Adhesive Selection
Choosing the right materials is crucial for a durable and visually appealing bathroom.
Choosing the Wrong Tile Type
- How to match tile types with the bathroom’s functional and aesthetic requirements: Consider moisture resistance, slip resistance, and overall look.
- The impact of choosing non-suitable tiles for the wet bathroom environment: Non-suitable tiles can lead to water damage and mold growth.
Ignoring the Adhesive and Grout Requirements
- Understanding different adhesives and their applications: Certain adhesives are better suited for specific tile types and locations.
- The significance of selecting the appropriate grout: Grout plays a key role in the durability and waterproofing of the tile installation.
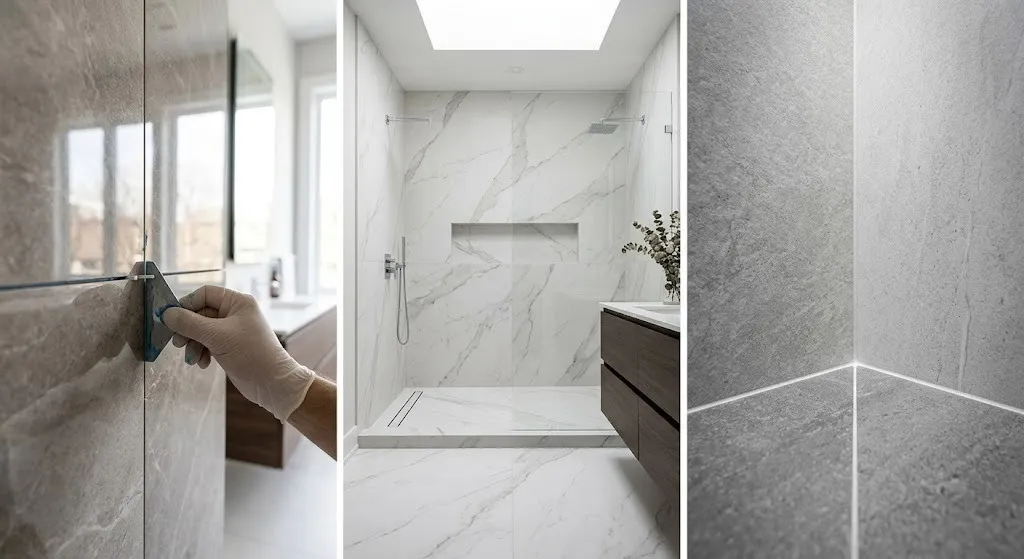
Disregarding the Sealant
- The role of sealants in prolonging tile life: Sealants protect against moisture and stains.
- How and where to apply sealant correctly: Areas prone to water exposure should always be sealed properly.
Mistake 3: Inconsistent Tile Spacing and Alignment
Precision in spacing and aligning tiles cannot be overstated for an aesthetically pleasing result.
Overlooking the Importance of Tile Spacers
- How spacers contribute to uniform grout lines and aesthetics: Spacers help in achieving an evenly spaced and professional-looking finish.
- The recommended spacer sizes for different tile types: Choose the size based on the tile size and personal preference for grout line width.
Skimping on Leveling
- Techniques for ensuring tiles are level during installation: Using a level and taking your time is crucial.
- The issues that arise from uneven bathroom tile installation: Uneven installation can lead to visual disharmony and areas prone to water pooling.
Ignoring the Expansion Joint
- The necessity of including an expansion joint in tile layouts: Expansion joints prevent tiles from cracking due to temperature and humidity changes.
- How to correctly incorporate expansion joints: These are particularly important in larger installations and must be included as per guidelines.
Mistake 4: Hasty Grouting and Sealing Process
The final steps in tile installation are as vital as the first.
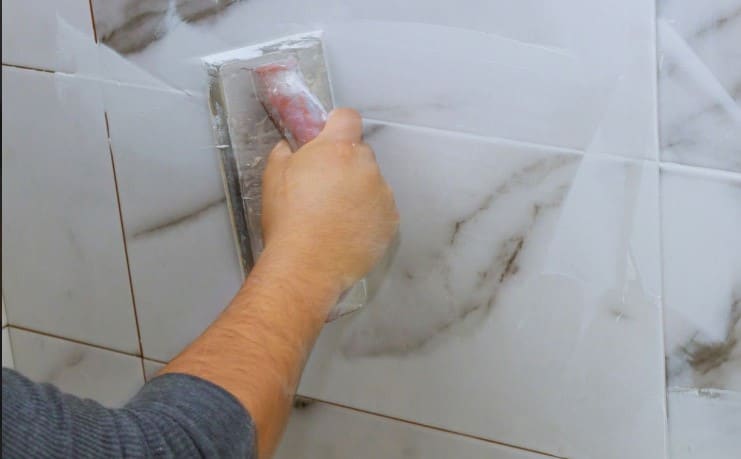
Rushing Through the Grouting Phase
- The importance of allowing tiles to set before grouting: Patience ensures that tiles are firmly in place.
- Tips for mixing and applying grout properly: Mix according to manufacturer instructions for optimal results.
Neglecting Proper Sealant Application
- Steps for applying sealant effectively: Follow product directions and ensure comprehensive coverage.
- The consequences of inadequate sealing: Poor sealing can lead to water damage and mold.
Forgetting to Clean Excess Grout and Sealant
- The importance of timely clean-up for a professional finish: Excess material can be difficult to remove once cured and can mar the appearance of your project.
- Techniques for removing excess without damaging tiles or grout: Use appropriate tools and be gentle to avoid damage.
Mistake 5: DIYing Complex Installation Without Adequate Skill
While DIY can be rewarding, recognizing when to call in professionals is key.
The Allure and Pitfalls of DIY
- When it’s suitable to DIY and when to call professionals: Assess the project’s complexity and your skill level honestly.
- The potential costs of overestimating DIY capabilities: Mistakes can be more costly to fix than hiring professionals from the start.
Ignoring the Learning Curve
- Resources for proper tile installation training: Online tutorials, workshops, and community college courses can be valuable.
- The importance of practice before embarking on the actual project: Practice makes perfect. Try your hand on a smaller project or a practice board first.
Underestimating the Value of Professional Tools and Techniques
- How professional-grade tools contribute to a better finish: The right tools can make the job easier and result in a more polished finish.
- The advantages of leveraging professional techniques: Professionals employ techniques that come from years of experience, leading to more durable and attractive results.
Ensuring a Flawless Tile Installation in Your Bathroom
When it comes to upgrading your bathroom with new tiles, avoiding a few common mistakes can make a huge difference. First off, don’t rush your project; taking your time to place each tile correctly ensures it will look great and last long. Making sure you have all the right tools and materials from the start can save you a lot of headaches later. Also, remember that each tile needs space for grout; this is important for a clean, professional look. Don’t ignore the preparation of your surface; a smooth, clean surface means your tiles will stick better and stay put. Lastly, be patient with the drying process; it might seem slow, but it ensures everything sets correctly. Keeping these points in mind will not only help your bathroom look its best but also make you feel proud every time you step inside. With the right preparation, patience, and materials, you’re on your way to creating a space that shines with your effort and attention to detail.
FAQ: Answers to Your Common Tile Installation Questions
What is the most suitable type of tile for bathrooms?
Tiles with high moisture resistance and slip resistance, like ceramic, porcelain, or stone, are ideal.
How long should I wait before using the bathroom after tile installation?
It’s recommended to wait at least 24-48 hours before walking on the floor tiles and a week before exposing them to significant moisture.
Can I install new tiles over the old tiles in the bathroom?
Yes, but it requires proper preparation. Ensure the old tiles are clean, secure, and level.
What’s the best way to ensure waterproofing in a tiled bathroom?
Use appropriate waterproofing membranes, select the right grout and sealant, and ensure proper application.
How often should bathroom tiles be resealed?
It depends on the tile type, but generally, resealing every 1-2 years is recommended to maintain moisture resistance and appearance.
Tackling a bathroom renovation project can be a daunting prospect, but armed with the right knowledge and a thoughtful approach, you can avoid common pitfalls and ensure your new bathroom stands the test of time. Happy tiling!