Embarking on a home renovation journey can light up the excitement in any homeowner, especially when it comes to transforming your living space, starting with the floors. Opting for new tiles can not only breathe new life into your home’s appearance but also potentially bump up its market value. Whether you’re rolling up your sleeves to do it yourself or considering bringing in a professional for help, grasping the essentials of tile installation is crucial. Our guidance is designed to simplify the process for you, guiding you through every key phase step by step. From choosing the perfect tiles that match your taste to admiring your space’s transformed look, we’re here to ensure a smooth sailing experience. By familiarizing yourself with the installation process, you’ll approach the project with more confidence, ready to achieve that beautiful, character-adding, and warmth-bringing floor you’ve envisioned for your home.
Setting the Foundation for Your Tile Installation Project
Diving into a tile installation project is like starting a fun and exciting journey. Think of it as putting together a huge puzzle in your home, like in the bathroom, kitchen, or living room. It’s not just about sticking tiles onto a wall or tile floor installation. You’ll need to be patient because it can take some time to get everything just right. Being precise is super important too, because all the pieces need to fit together perfectly. Plus, knowing a little about how to do it can help. Before you begin, making sure you have everything ready and planned out means you’re more likely to end up with a result you’re happy with. It’s all about preparing well, taking your time, and adding your touch of magic to make the space truly yours.
Understanding the Scope of Your Project
Starting any big project can feel both exciting and daunting at the same time. Imagine you’re about to lay down new tiles in your home—it’s not just about picking the prettiest ones from the store. Before anything else, you need to measure the room carefully. Knowing exactly how much space you’ve got helps you buy the right amount of tiles and avoid any surprises later on. Then, it’s time to choose the type of tile. Will it be ceramic for easy cleaning, or perhaps something textured to add a bit of flair?
Each type has its benefits, so think about what matters most to you. And finally, picture the finished room in your mind. Choosing colors and patterns that match your vision makes all the difference. When you plan carefully from the start, you set yourself up for a project that turns out just the way you hoped. It’s all about measuring, choosing wisely, and keeping your end goal in mind.
Materials Checklist
Gathering your materials and tools beforehand can save you time and unnecessary stress. Here’s a quick list to keep you organized:
- Measuring tape and chalk line
- Tile cutter and nippers
- Notched trowel and rubber float
- Level and spacers
- Thin-set mortar and grout
- Underlayment materials
- Safety equipment
Preparation Steps
Preparing your space is akin to prepping a canvas for painting. It’s all about creating the perfect base for your tiles to shine.
- Clear the room to create a workspace.
- Ensure the surface you’re tiling is clean, dry, and level.
- Remember, a little extra time spent here can make a big difference in the outcome.
Step 1: Subfloor Preparation – The Bedrock of Your Tile Floor Installation
When you’re excited about putting new tiles in your home, it’s easy to forget about the subfloor, but that’s super important. Think of your subfloor as the bed for your tiles. Just like how you wouldn’t want your bed to be all bumpy and uneven, your tiles need a smooth and strong base too. Making sure this base is ready means checking that it’s flat, clean, and solid. If it’s wobbly or damaged, your beautiful tiles might crack or get loose, and nobody wants that. So, before you start laying down those fancy tiles, take some time to look at the subfloor. It might sound a bit boring, but it’s all about making sure your tiles look great and last long. It’s kind of like making sure the roots of a plant are healthy, so the plant can grow beautiful flowers. Just a little effort in the beginning can make a huge difference in how your floors look and how long they last.
Inspecting the Subfloor
Check for any signs of damage or unevenness. Addressing these issues early can prevent problems down the line.
Choosing the Right Underlayment
The right underlayment acts as a stable base, reducing tile movement and preventing cracks. Options vary from cement backer boards to uncoupling membranes, depending on your specific needs.
Leveling and Cleaning
A level subfloor equals a smooth installation. Use a leveling compound if necessary, and ensure the area is clean before moving on.
Step 2: Layout Planning – Mapping Your Masterpiece
When you’re getting ready to start a project, like decorating a room or setting up a garden, it’s super helpful to imagine what you want it to look like when it’s all done. Think of it as drawing a picture in your mind of the finished project. This step is important because it helps you figure out what you need to do and what stuff you need to make your vision come to life. Just like when you’re baking a cake, and you follow a recipe to make sure it tastes good, planning your layout makes sure everything fits perfectly and looks awesome in the end. It’s a bit like using a map before starting a journey; knowing where you’re going helps you pick the best path to get there. So, taking a moment to picture the result can make a big difference in achieving that professional look you’re aiming for.
Measuring and Marking
Precise measurements and clear markings are your best friends. They guide your installation and help avoid costly mistakes.
Determining Your Starting Point
Choosing where to start can influence the installation’s ease and aesthetic. Consider visual balance and practicality.
Dry Layout
Laying tiles out dry gives you a preview, allowing adjustments before committing. It’s a step that pays off in the long run.
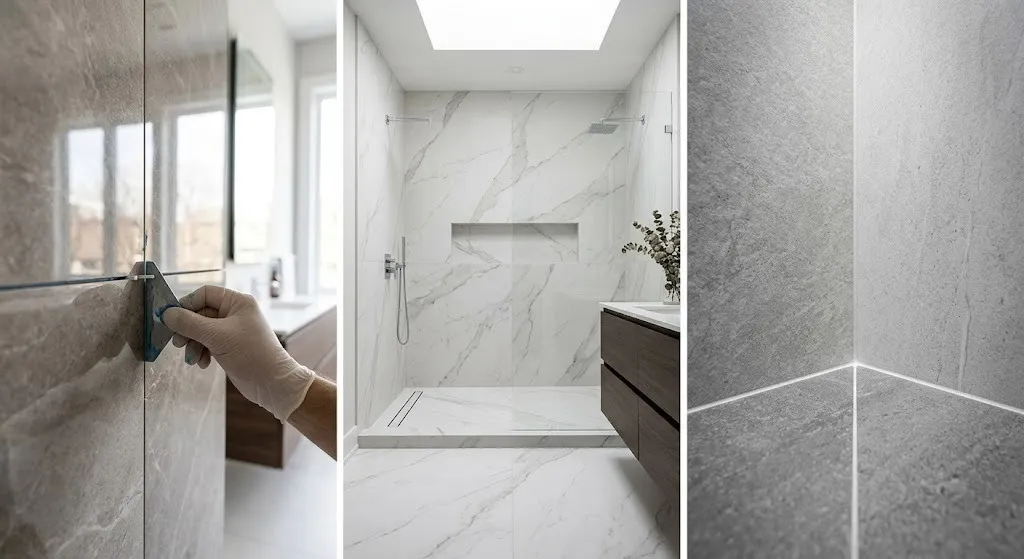
Step 3: Adhesive Application – The Art of Tile Bonding
Choosing the right glue and way to put your tiles on is super important if you want your tiled areas to look awesome and stay that way for a long time. Imagine, you wouldn’t want to see your kitchen or bathroom tiles start to pop off or look sad a few months after you set them up, right?
So, here’s the deal: picking the perfect adhesive is like finding the best buddy for your tiles. It makes sure they stick to where they’re supposed to be, no matter if it’s on the wall or the floor, inside or outside. And the way you put them matters too! You’ve got to spread the glue evenly and press the tiles down right so they’re snug and happy in their new home. To sum it up, a good match between the tiles and their adhesive, along with careful application, means you’ll have a beautiful, sturdy surface that’ll keep looking great for years to come. Trust me, a little attention to these details now can save you a lot of hassle later!
Choosing the Right Adhesive
Your tile choice dictates the adhesive type. There are specific adhesives for porcelain, ceramic, and natural stone tiles.
Application Techniques
Apply adhesive with a notched trowel at a 45-degree angle for an even spread, ensuring a strong bond.
Working in Sections
The adhesive dries quickly, so work in small sections. This approach keeps your work manageable and efficient.
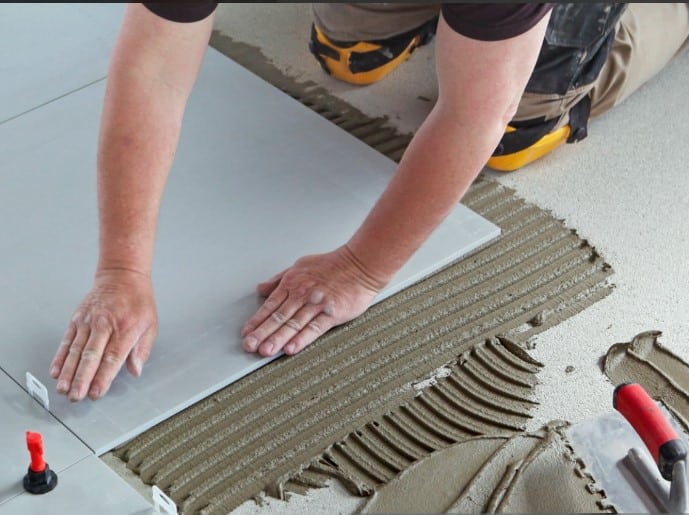
Step 4: Laying the Tiles – Precision Meets Practice
When you’re getting ready to decorate your room, putting tiles down in a clever way is like making sure your outfit looks just right before stepping out. It makes all the difference! Think of it as laying down puzzle pieces on your floor or walls. If you do it with lots of care and pay attention, you’ll end up with something that makes everyone say “Wow!” It’s like if you rush through a job, you might end up with a crooked picture hanging on the wall – not a good look, right? But if you take your time, measure twice, and place each tile just so, you’re setting the stage for a room that shines. This isn’t just about sticking tiles down; it’s about creating a space that feels good to be in, every single day. So, remember, acting like a real pro with your tiles doesn’t just mean you’re good at DIY; it means you’re making your space the best it can be, which is always a win.
Placing the Tiles
Gently place and press each tile into the adhesive, using spacers for even gaps. It’s a simple yet satisfying process.
Cutting Tiles
Cutting tiles to fit edges and obstacles can be tricky. A wet saw or tile cutter makes this task accessible, even for beginners.
Spacing and Alignment Checks
Regular checks ensure your tiles stay aligned and evenly spaced. It’s about keeping an eye on the details.
Step 5: Grouting – The Finishing Touch
When you’ve got beautiful tiles laid out on your floor or wall, think of grout as the friend that helps keep them all snug and secure. Imagine it like the icing between cake layers—it fills up the little gaps between each tile, making sure no water or dirt sneaks through. Not only does it play the role of protector, keeping your tiles stuck together nicely, but it also puts the final touch on your tile floor installation work, making it look complete and polished. So next time you see those neat lines crisscrossing between your tiles, remember, that grout is doing a lot more than just sitting there looking pretty. It’s sealing the deal on your installation, ensuring your tiles stay in top shape for years to come.
Selecting Grout
Your tile type and aesthetic preference guide your grout selection. From sand to unsanded, color choices abound.
Application Process
Applying grout with a rubber float and wiping away the excess requires a bit of elbow grease but is oh-so-rewarding.
Curing and Sealing
Allowing grout to cure properly before sealing is crucial for maintaining its appearance and durability.
Long-Term Care
Keeping your tile floor clean is like giving it a little hug every day; it’s a simple act that shows you care and want it to look its best. The trick is to use the right cleaning products that are kind to your tiles and tough on dirt. Imagine your floor shining and smiling back at you, making the whole room feel welcoming. It’s not just about scrubbing away; it’s about choosing the right tools and cleaners that bring out the beauty of your tiles without harming them. Once you’ve got the hang of it, cleaning your floor becomes less of a chore and more of a rewarding activity. Every sweep and mop not only cleans but also revives, ensuring your space looks bright and inviting. So, remember, with a little bit of regular care and the right products, your tile floor installation will always be ready to impress and make your space a joy to be in.
Pride in Your Project
When you look at the floor you’ve just finished, it’s easy to see just wood, tiles, or carpet. But, it’s so much more than that. It’s a clear sign of your hard work and creativity. Every piece you picked and placed down didn’t just happen by accident. It took time, thought, and a lot of effort. Think about all the choosing, planning, and doing you did. That floor is like a big picture that shows how much you can achieve when you put your mind to it. It reminds us that when we get into a project and give it our all, we create something beautiful and strong, just like that floor. So next time you walk across it, remember, it’s not just a floor. It’s proof of what you can do.
Conclusion and Maintenance Tips
Final Inspection
Taking a moment to admire and check your work is like giving yourself a pat on the back and a second chance, all rolled into one. Think of it as looking at a picture you’ve just drawn. By stepping back and giving it a good look, you can catch the little things you might have missed while drawing. Maybe the colors need to be brighter, or perhaps there’s a spot you forgot to fill in. It’s much easier to make these small fixes now, rather than realizing later, when the paint has dried, and it’s too late to change anything. This isn’t just about making things perfect; it’s about giving your work the time and respect it deserves. So, before you call it done, take that extra minute to look it over. You’ll be surprised at what you might find, and even the smallest change can make a big difference. This way, you can be proud of what you’ve created, knowing you’ve given it your all.
Frequently Asked Questions
Can I install tile over an existing floor?
Yes, but ensure the existing floor is stable and prepare it correctly.
How long do I need to wait before walking on my new tile floor?
Typically, wait about 24 hours before walking on the tiles and 72 hours for grout to fully cure.
What’s the difference between sanded and unsanded grout?
Sanded grout is used for wider joints and unsanded for narrower ones.
Do I need a professional to install the tile, or can I do it myself?
With patience and attention to detail, many can complete a tile installation.
How do I choose the right tile for high-moisture areas?
Opt for non-porous tiles like porcelain or glazed ceramic for moisture resistance.
Embarking on your tile installation project is both exciting and demanding. Armed with this guide, you’re well on your way to achieving beautiful, lasting results that elevate the look and feel of your space. Remember, success lies in preparation, understanding the materials and processes, and regular care. Ready, set, transform!